Mold is one of those problems that people either ignore until it gets serious or attack with the most aggressive chemical they can find. Neither approach makes sense. Ignoring mold lets it spread and degrade your air quality. And blasting it with chlorine bleach, while immediately satisfying, is often less effective than simpler, non-toxic methods and introduces its own set of health concerns.
Based on NonToxicLab’s research, mold prevention and removal does not require toxic chemicals. Vinegar, hydrogen peroxide, tea tree oil, proper ventilation, and humidity control are genuinely more effective strategies for most residential mold situations. I am not saying this because natural sounds nice. I am saying this because the science supports it.
Here is how to prevent mold from growing in your home, how to remove it safely when it does appear, and when the job is too big for DIY.
Why Mold Grows (and What Stops It)
Mold needs four things to grow:
- Moisture (relative humidity above 50-60% or direct water contact)
- An organic food source (wood, drywall paper, dust, fabric, carpet backing)
- Temperatures between 40-100 degrees F (mold grows fastest at 77-86 degrees)
- Oxygen (mold is aerobic)
You cannot eliminate organic surfaces (your walls, floors, and furniture all qualify), you cannot eliminate oxygen, and you cannot keep your home below 40 degrees. That leaves moisture as the only controllable factor. Every effective mold prevention strategy comes down to moisture control.
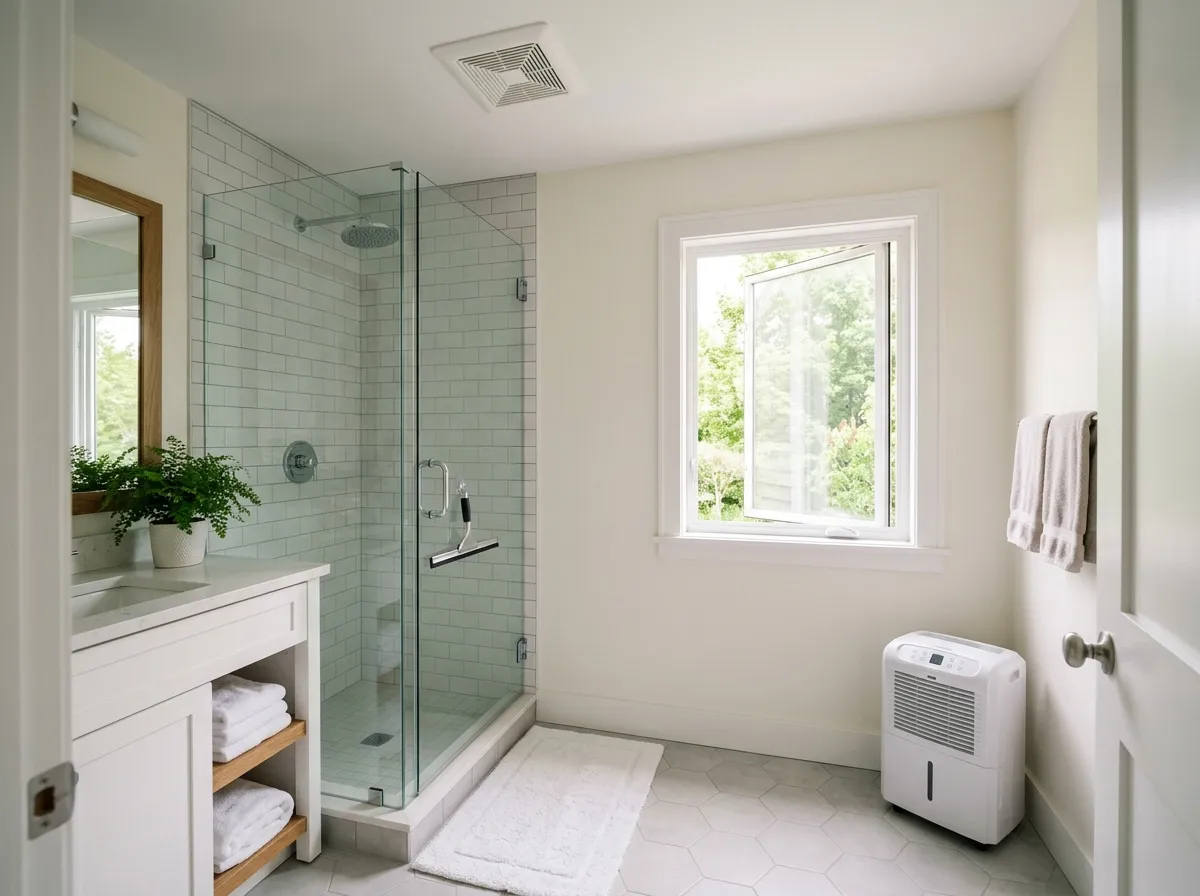
This is why a dehumidifier is the most important mold prevention tool you can own. It directly removes the one ingredient you can control.
Prevention: The First Line of Defense
Preventing mold is always easier, cheaper, and healthier than removing it after it has established itself.
Control Indoor Humidity
Keep indoor relative humidity between 30% and 50%. This single action prevents more mold than every cleaning product combined.
How to maintain proper humidity:
- Run a dehumidifier in basements, crawl spaces, and any room that consistently exceeds 50% humidity. A 50-pint unit covers up to 1,500 square feet.
- Use an air quality monitor or a standalone hygrometer ($10-$15) to track humidity in susceptible areas. Place sensors in the basement, bathrooms, and any room with a history of moisture issues.
- Run your air conditioning during humid months. AC removes moisture from the air as a byproduct of cooling.
- Avoid hanging wet laundry indoors. A single load of wet laundry releases several pints of moisture into the air as it dries.
- Vent your clothes dryer to the outside. An indoor-vented dryer dumps massive amounts of hot, humid air into your home.
Ventilate Bathrooms Properly
Bathrooms are the most common site for residential mold. Every shower and bath fills the room with steam that condenses on cooler surfaces (walls, ceiling, grout lines, glass).
Bathroom ventilation rules:
- Run the bathroom exhaust fan during every shower or bath and for at least 30 minutes afterward. This is non-negotiable for mold prevention. If you skip this step, everything else is fighting uphill.
- Make sure the exhaust fan actually vents to the outside, not into the attic. An attic-vented bathroom fan simply moves the moisture problem from the bathroom to the attic, where it causes mold and wood rot that you cannot see.
- If your bathroom does not have an exhaust fan, open the window during and after showering. In bathrooms without windows or fans, installing a fan (typically $150-$300 including installation) is one of the best investments you can make for mold prevention.
- Leave the bathroom door open after showering to allow moisture to disperse into the rest of the house, where a dehumidifier or air conditioner can handle it.
- Squeegee shower walls and glass after each use. This removes the liquid water that would otherwise evaporate slowly and keep humidity elevated.
Use Kitchen Ventilation
Cooking generates both moisture and particulate matter. Boiling water, steaming vegetables, and running the dishwasher all add humidity to the kitchen.
- Use a range hood vented to the outside while cooking. Recirculating range hoods (the kind that filter air and blow it back into the kitchen) remove grease and odors but do not remove moisture.
- Run the kitchen exhaust fan or open a window when the dishwasher is in its drying cycle.
- Fix any sink leaks promptly. A slow drip under the kitchen sink creates a dark, damp environment that is ideal for mold.
Fix Leaks and Water Intrusion
Mold from chronic moisture sources (leaking pipes, roof leaks, foundation cracks, poor drainage) will always come back no matter how much you clean it unless you fix the source.
Priority leak fixes:
- Plumbing leaks. Check under all sinks, around toilets, and behind the washing machine for any dripping or dampness. Even a tiny, slow leak creates enough moisture for mold.
- Roof and flashing. Inspect your attic after heavy rain for signs of water intrusion: dark stains on rafters, damp insulation, or visible dripping.
- Foundation. Water seeping through foundation walls or floor is the most common source of basement mold. Exterior grading should slope away from the house. Gutters should be clean and downspouts should discharge at least 4-6 feet from the foundation.
- Window condensation. If windows fog up or drip with condensation in winter, the indoor humidity is too high. Run a dehumidifier and improve ventilation.
Improve Airflow
Stagnant air allows moisture to accumulate on surfaces. Good airflow helps moisture evaporate before mold can establish itself.
- Keep furniture a few inches away from exterior walls, especially in basements. The gap allows air to circulate behind the furniture and prevents the trapped-moisture conditions that lead to mold growth on the wall behind a bookcase or couch.
- Use ceiling fans or portable fans to keep air moving in rooms where humidity tends to be higher.
- Keep closet doors open periodically to prevent stagnant, humid air from accumulating. Dark, closed closets with poor airflow are common mold sites, especially if they share an exterior wall.
- Do not carpet basements. Carpet on a concrete slab traps moisture between the carpet backing and the concrete, creating ideal mold conditions that you cannot see until the mold is established.
Natural Mold Removal: What Actually Works
When mold does appear, you do not need chlorine bleach or commercial mold killers. Here is what works, ranked by effectiveness and safety.
Vinegar: Better Than Bleach for Porous Surfaces
White distilled vinegar (5% acetic acid) kills approximately 82% of mold species, according to research. More importantly, it penetrates porous surfaces like wood, drywall, and grout, which is where bleach fails.
Why vinegar beats bleach on porous surfaces: Chlorine bleach (sodium hypochlorite) works by oxidizing the mold on contact. But bleach is mostly water, and the chlorine component does not penetrate porous materials effectively. What happens in practice is that bleach kills the mold on the surface but the water soaks into the material, providing moisture for surviving mold roots (hyphae) deeper inside. The mold appears to be gone for a few days or weeks, then grows back because the root structure was never killed.
Vinegar’s acetic acid penetrates porous materials more effectively than chlorine. It kills the mold at the surface and the root structures below. The mold is less likely to return after vinegar treatment.
How to use vinegar for mold:
- Pour undiluted white vinegar (5% acetic acid) into a spray bottle. Do not dilute it.
- Spray generously on the moldy area. Saturate it.
- Let it sit for at least one hour. The acetic acid needs time to penetrate and kill the mold.
- Scrub with a brush. For grout lines, a stiff grout brush works well. For flat surfaces, a scrub brush or microfiber cloth.
- Wipe clean and let the area dry completely.
- The vinegar smell dissipates within a few hours.
Limitation: Vinegar is not effective on all mold species. For the roughly 18% of species it does not kill, hydrogen peroxide is a good secondary treatment.
Hydrogen Peroxide: The Heavy Hitter
Hydrogen peroxide (3%, the standard pharmacy concentration) is antifungal, antibacterial, and antiviral. It kills mold on contact and breaks down into water and oxygen, leaving no toxic residue.
How to use hydrogen peroxide for mold:
- Pour 3% hydrogen peroxide into a spray bottle. Do not dilute.
- Spray directly on the mold and surrounding area.
- Let it sit for 10-15 minutes. You will see fizzing as the peroxide reacts with the mold.
- Scrub with a brush.
- Wipe clean.
Hydrogen peroxide is safe for most surfaces including tile, grout, glass, and sealed stone. Test on an inconspicuous area first on colored grout or fabric, as peroxide has mild bleaching properties.
For stubborn mold, you can use vinegar and hydrogen peroxide as a one-two punch: apply vinegar first, wait an hour, wipe, then apply hydrogen peroxide. Do not mix them in the same bottle (they form peracetic acid, which is irritating). Apply them sequentially.
Tea Tree Oil: Best for Prevention After Cleaning
Tea tree oil (Melaleuca alternifolia) is a potent natural antifungal. Research published in the Journal of Applied Microbiology found tea tree oil effective against a range of fungi including common household mold species.
Tea tree oil is best used as a preventive spray after cleaning, rather than as a primary mold remover. It leaves a residual antifungal barrier on surfaces.
How to make a tea tree oil mold prevention spray:
- Add 1 teaspoon of tea tree oil to 1 cup of water in a spray bottle.
- Shake well before each use (oil and water separate).
- Spray on clean surfaces where mold tends to recur: grout lines, window frames, basement walls, shower walls.
- Do not rinse. Let the tea tree oil dry on the surface.
Tea tree oil has a strong, medicinal smell that many people find unpleasant. It fades within a day or two. The antifungal properties remain on the surface after the smell dissipates.
Note: Tea tree oil can be toxic to cats and dogs if ingested or absorbed through the skin. Use it in areas where pets cannot lick treated surfaces. Once dry, the risk is minimal, but avoid spraying it where pets have direct contact.
Baking Soda: Mild but Useful
Baking soda (sodium bicarbonate) is a mild antifungal that also absorbs moisture. It is less effective than vinegar or hydrogen peroxide for killing established mold, but it is useful as a gentle cleaning agent and for absorbing the musty odor associated with mold.
How to use baking soda:
- Mix 1 tablespoon of baking soda into 1 cup of water in a spray bottle.
- Spray on the moldy surface.
- Scrub with a brush.
- Rinse and spray again without scrubbing.
- Let the second application dry on the surface as a preventive layer.
Baking soda is safe for all surfaces and completely non-toxic, making it the best option for mold cleaning in children’s rooms or areas where pets spend time.
Why Bleach Is Not the Best Choice
I know this goes against conventional wisdom. Most people reach for bleach when they see mold. Here is why I do not recommend it for most residential mold situations:
Bleach does not kill mold on porous surfaces. As explained above, the chlorine in bleach does not penetrate porous materials like wood, drywall, and grout. It removes the visible surface mold (making it look clean) while leaving the root structure alive in the material. The mold returns, often within weeks.
Bleach introduces its own health concerns. Chlorine bleach releases chlorine gas and chloramines, which are respiratory irritants. In a small bathroom with poor ventilation (exactly where you are most likely to be using it on mold), bleach fumes can cause coughing, eye irritation, and breathing difficulty. If you are already sensitive to mold, adding bleach fumes to the equation is not helpful.
Bleach should never be mixed with other cleaners. Mixing bleach with ammonia-based cleaners produces chloramine gas (potentially fatal). Mixing bleach with vinegar produces chlorine gas (toxic). The risk of accidental mixing is real, especially in bathrooms where multiple cleaning products are stored.
Bleach works on non-porous surfaces. To be fair, bleach is effective on tile, glass, porcelain, and metal. If the mold is on a non-porous surface and you prefer bleach, dilute it (1 cup per gallon of water), ventilate the area well, and wear gloves. But even on non-porous surfaces, hydrogen peroxide works just as well without the fumes.
When to Call a Professional
DIY mold removal is appropriate for small mold problems. There are situations where you should hire a professional:
The affected area exceeds 10 square feet. The EPA uses this as a general threshold. Mold covering more than about 3 feet by 3 feet may indicate a larger problem behind walls or under flooring that requires professional assessment and containment.
Mold is inside HVAC ductwork. Mold in your heating and cooling system gets distributed throughout the house every time the system runs. Duct cleaning for mold requires specialized equipment and containment procedures that are beyond DIY capability.
There is a history of water damage. If the mold followed a flood, burst pipe, or sewage backup, the contamination may be more extensive than what is visible. Floodwater can carry bacteria and other contaminants alongside mold, requiring professional-grade cleanup.
You can smell mold but cannot find it. A persistent musty smell without visible mold suggests growth behind walls, under flooring, or in other concealed spaces. A professional can use moisture meters, thermal imaging, and targeted air sampling to locate hidden mold.
Someone in the household has respiratory issues. If anyone in your home has asthma, chronic respiratory conditions, or is immunocompromised, even small mold problems should be handled with extra caution. Professional remediation with proper containment (negative air pressure, HEPA filtration) minimizes spore exposure during removal.
Black mold (Stachybotrys chartarum). While all mold should be removed, Stachybotrys produces mycotoxins that are particularly concerning for health. If you see dark black mold with a slimy or wet texture, especially on materials that have been water-damaged for extended periods, professional testing and remediation is advisable.
Finding a Mold Professional
Look for professionals certified by the IICRC (Institute of Inspection, Cleaning and Restoration Certification) or the ACAC (American Council for Accredited Certification). Avoid companies that offer both testing and remediation, as this is a conflict of interest. The company that identifies the problem should not be the one you pay to fix it.
Professional mold remediation typically costs $500-$6,000 for localized problems and $10,000-$30,000+ for extensive contamination. The cost depends on the extent of growth, the materials affected, and whether containment and reconstruction are needed.
Room-by-Room Mold Prevention
Bathroom
Bathrooms are the number one mold site in most homes.
- Run the exhaust fan during and 30 minutes after every shower
- Squeegee shower walls and glass doors after each use
- Wash shower curtains monthly (machine wash with 1 cup of vinegar)
- Re-caulk shower and tub seams when caulk cracks or pulls away
- Spray tea tree oil solution on grout and caulk lines weekly
- Fix any leaks around the toilet base, sink, or shower immediately
- Use non-toxic bathroom cleaners that contain natural antifungals
Kitchen
- Run the range hood when cooking, especially when boiling water or steaming
- Wipe down sink backsplash and counter areas daily
- Check under the sink monthly for leaks or dripping
- Empty and clean drip pans, the refrigerator water tray, and any standing water
- Keep garbage disposal clean (run with ice cubes and vinegar monthly)
Basement
- Run a dehumidifier to keep humidity below 50%
- Do not carpet concrete floors (use area rugs that can be washed)
- Keep items off the floor on shelving or pallets
- Ensure gutters are clean and downspouts direct water away from the foundation
- Seal foundation cracks with hydraulic cement or professional-grade sealant
- Inspect walls and floor regularly for dampness, especially after rain
Bedroom
- Keep humidity below 50% (an air quality monitor tracks this for you)
- Open windows periodically for fresh air exchange
- Leave closet doors open regularly for airflow
- Do not push furniture directly against exterior walls in humid climates
- Choose a non-toxic mattress with breathable construction (trapped moisture under a mattress on a solid platform can grow mold)
- Use breathable bedding materials that wick moisture rather than trapping it
Laundry Room
- Vent the dryer to the outside (never into the house)
- Leave the washing machine door open between loads (front-loaders are especially prone to mold in the gasket)
- Clean the washing machine gasket monthly with vinegar
- Wipe down the inside of the washing machine drum and gasket after the last load of the day
- Fix any hose leaks immediately
Monitoring for Mold Long-Term
Mold prevention is not a one-time project. It is an ongoing practice.
Monitor humidity continuously. An air quality monitor with humidity tracking gives you real-time data and historical trends. The Airthings Wave Plus and Awair Element both track humidity alongside other air quality metrics. Place sensors in your most susceptible areas: basement, bathrooms, and any room with a history of moisture issues.
Inspect visually on a schedule. Check behind toilets, under sinks, around window frames, in shower grout, and along basement walls quarterly. Early mold spots (small discolorations) are easy to clean with vinegar. Established colonies behind drywall are expensive to remediate.
Address problems immediately. A small leak that goes unrepaired for weeks can produce a mold problem that costs thousands to fix. Prompt action on moisture issues is the most cost-effective mold prevention strategy.
Test if concerned. If you suspect mold but cannot see it (persistent musty smell, unexplained allergy symptoms that worsen at home), our guide to testing indoor air quality covers both DIY and professional testing options.
For a broader approach to healthy indoor air that goes beyond mold, our indoor air quality guide covers VOCs, particulate matter, radon, and other pollutants alongside humidity management. And for tested non-toxic cleaning solutions that work for mold and everything else, our non-toxic cleaning products guide has tested recommendations.
Quick Answers
Does vinegar kill mold?
Yes. White distilled vinegar (5% acetic acid) kills approximately 82% of mold species and penetrates porous surfaces like wood and grout more effectively than chlorine bleach. Apply undiluted vinegar to the moldy area, let it sit for at least one hour, scrub with a brush, and wipe clean. For the remaining mold species that vinegar does not kill, follow up with 3% hydrogen peroxide.
Is bleach or vinegar better for mold?
Vinegar is better for porous surfaces (wood, drywall, grout, caulk), which is where most household mold grows. Bleach kills surface mold on porous materials but does not penetrate deep enough to kill the root structure, so the mold returns. Bleach works on non-porous surfaces (tile, glass, porcelain), but hydrogen peroxide works equally well without the irritating fumes. For most home mold situations, vinegar and hydrogen peroxide are the better choices.
Does tea tree oil kill mold?
Research published in the Journal of Applied Microbiology found tea tree oil effective against multiple fungal species. It works best as a preventive treatment on clean surfaces rather than as a primary mold killer. Mix 1 teaspoon of tea tree oil with 1 cup of water, spray on clean surfaces, and let dry without rinsing. Note that tea tree oil can be toxic to cats and dogs if ingested.
What humidity level causes mold?
Most mold species need sustained relative humidity above 60% to grow. Above 70%, mold growth becomes almost certain within 24-72 hours on organic materials. The EPA recommends keeping indoor humidity between 30-50%. For mold prevention, aim for 45-50% using a dehumidifier in susceptible areas.
Can I remove black mold myself?
Small areas of black mold (less than 10 square feet) on non-structural surfaces can be removed with vinegar or hydrogen peroxide following the methods in this guide. Wear an N95 mask, gloves, and eye protection. Open windows for ventilation. If the mold covers more than 10 square feet, is on structural materials, is inside walls or HVAC systems, or anyone in the household has respiratory conditions, hire a professional mold remediation company.
How do I prevent mold in the shower?
Run the bathroom exhaust fan during and for 30 minutes after every shower. Squeegee shower walls after each use. Spray grout lines and caulk weekly with a tea tree oil solution (1 teaspoon tea tree oil per cup of water). Re-caulk seams when the caulk cracks or pulls away. Wash shower curtains monthly with 1 cup of vinegar in the wash cycle. Fix any grout gaps or failing caulk promptly, as these allow water to penetrate behind tile where mold grows unseen.
Does hydrogen peroxide remove mold from grout?
Yes. Spray 3% hydrogen peroxide directly on the grout, let it sit for 10-15 minutes (you will see fizzing), then scrub with a grout brush and wipe clean. For stubborn grout mold, apply vinegar first, wait an hour, wipe, then apply hydrogen peroxide. Do not mix them in the same bottle. This one-two approach is highly effective on grout mold.
You Might Also Like
- Are Scented Candles Toxic? What the Air Quality
- How to Remove Mold Without Bleach
- Air Purifier vs Air-Purifying Plants
Sources
- U.S. EPA. “A Brief Guide to Mold, Moisture and Your Home.” EPA.gov.
- Centers for Disease Control and Prevention. “Mold: Basic Facts.” CDC.gov.
- World Health Organization. “WHO Guidelines for Indoor Air Quality: Dampness and Mould.” WHO, 2009.
- Carson, C.F., Hammer, K.A., & Riley, T.V. “Melaleuca alternifolia (Tea Tree) Oil: A Review of Antimicrobial and Other Medicinal Properties.” Clinical Microbiology Reviews, 2006.
- Menetrez, M.Y., et al. “Testing Antimicrobial Cleaner Efficacy on Mold on Gypsum Wallboard.” Environmental Science and Pollution Research, 2007.
- IICRC. “S520 Standard for Professional Mold Remediation.” Institute of Inspection, Cleaning and Restoration Certification.
- Mendell, M.J., et al. “Respiratory and Allergic Health Effects of Dampness, Mold, and Dampness-Related Agents.” Environmental Health Perspectives, 2011.